At the end of February,
Facebook introduced the Timeline layout
for personal profile pages. Now that the Timeline layout is set to roll
out for Facebook business pages on March 30, it's important to prepare
your brand for the changes.
The
new presentation emphasizes chronological history, with the Timeline
extending back to when the business first started using Facebook or
back to the beginning of the business--well over 100 years for a
company like Coca-Cola. The design also features a large cover-photo
area, allowing for new,
creative ways to show off your business visually.
As
with most Facebook changes, users are divided as to whether they like
the new features. On the positive side, Timeline will allow page
administrators to highlight and pin posts to emphasize certain content.
Using the cover photo creatively may increase fan engagement. And
private messaging opens the doors wider for customer communication.
One big shift that Timeline brings to companies is the loss of the
former layout's default landing tab, which helped you grow your page's fan base with marketing and promotional efforts. With
Timeline you can still interact with users, but in my view it will become harder to convert users to customers or brand advocates.

 A bakery uses Timeline to show off its treats.
Do
some planning before creating your page, including choosing images and
apps, and developing a strategy for growing your fan base. These days
it's more important to keep your page updated frequently, and to
consider Facebook advertising.
Get Started
To start a new Facebook page, first click the
Create a Page link. Next, fill out the various fields and agree to Facebook's terms of service. After clicking the
Get Started
button, you need to upload a profile photo, add information about your
business, and choose your Facebook page address. Then you can start
inviting friends and working with the new Admin Panel.
If
you already have a Facebook business page, when you sign in Facebook
will likely display a prompt about how to get started with the Timeline
layout, so follow those steps.
Customize Your Timeline Page
Cover Photo
First off, add a
cover photo to your page, expressing in an 851-by-315-pixel image what
your company is about. Facebook bars these images from containing price
or purchase information, contact information, references to Facebook
features such as Like and Share, and any calls to action ("Tell your
friends” and such).
About Section
 The About section becomes more prominent, so fill it well.
The
About section contains the same information as in the previous layout
but stands out more prominently, so be sure to complete this portion.
You likely filled in this content during the page-setup process, but
you can still modify it by clicking the
Admin Panel button. Select the
Manage drop-down menu and then choose
Edit Page. On the Edit Page screen, select
Basic Information to edit the About information.
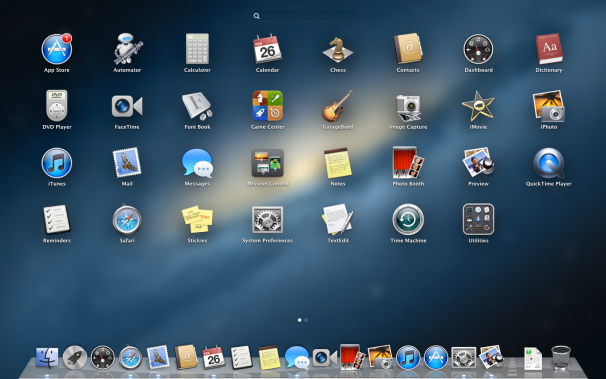
Application Boxes
Application
boxes give you a way to add interactivity to your page, similar to the
Facebook tabs from the older page layout. Each box links to an app
you've installed on your page. Though the top row offers four boxes,
the one for Photos is fixed, so you have just three to work with there.
Among the dozen boxes total, eight are visible only when the visitor
clicks the down arrow next to the top four app boxes.
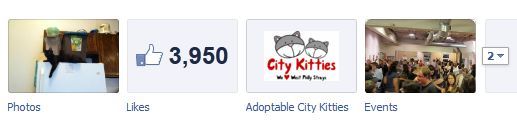 Visitors click apps boxes to access apps you've installed.
You
can add a custom, 110-by-74-pixel image to represent your app box.
Click the down arrow to the right of the apps boxes to open the ones
that aren't immediately displayed. Hover over the box that you want to
change, and a pencil icon appears. Click that icon to edit, and then
select
Edit Settings for a dialog box that will allow you to remove the application box, rename it, or change the custom image.
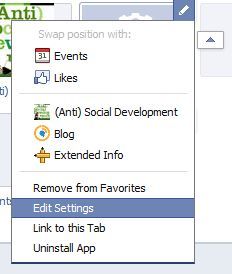 Here's where you edit the apps boxes.
Clicking
Change opens a new Facebook window. Within the new browser window will be your current image, plus another link called
Change. Click the link and upload the new image. If you go back to the original browser window, you'll see the updated image.
You
can move app boxes around by hovering over an app box, clicking the
pencil icon, and selecting the application that you would like to swap
positions with. You can also remove an app completely.
If
you create a custom Facebook page, it will appear in one of these
application boxes, so you will want to use an image and box order that
display it prominently.
Custom Pages
You still can create custom Facebook pages via
iframes coding or with third-party applications such as Pagemodo, but the procedure involves a few key changes.
Previously,
a custom page tab could not be more than 520 pixels wide. Now, a
Timeline custom page can be 810 pixels wide. If you already have a
custom page at the smaller width, Facebook will center the content in
the 810-pixel space, so you don't have to update the page immediately.
Regardless, the change in width is good, because it gives you a lot
more space to create a unique design.
 Now you can pin selected content to the top of your Timeline wall.
Unfortunately,
Timeline will not allow you to set a default landing tab, so all
visitors will go immediately to your Wall. Previously, you could set a
custom page as the default landing tab for all new visitors, a useful
way to present information about your company or promotions. Instead,
Facebook wants businesses to make a Wall post about their custom page
or offer. Since a Wall post doesn't stay at the top of the page for
long, you'll want to use a new feature called pinning.
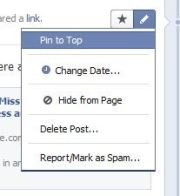
Pinning
You
can pin a post to the top of your Wall for up to seven days. This is
now the best way to highlight a custom page, a sweepstakes, or a
special offer. Just select a post, hover over the top right, click the
pencil icon, and select
Pin to Top.
Linking
If you want to include a link to your custom tab application, click the pencil icon to edit, and select
Link to this Tab. The link appears in a dialog box, and you can copy and paste it into your Wall post.
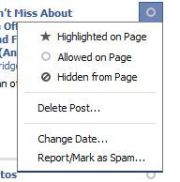
Highlighting
 Posts by your page visitors appear in a distinct section rather than on the Wall.
In
addition to pinning and linking, you can highlight a Wall post. This
action makes the post appear full width rather than showing in only one
of the two page columns. Highlight a post by hovering over the
top-right corner and clicking the star icon.
Messages From Fans
Fans
can now send a private message to your business via the Message button.
You can turn on messaging by going to the Admin Panel, selecting
Manage, Edit Page, and checking the
Messages
box on the Manage Permissions page. I wouldn't recommend turning this
feature off unless you are already managing customer feedback in
another location and don't have the resources to manage this function
via Facebook as well. You can check messages via the Admin Panel.
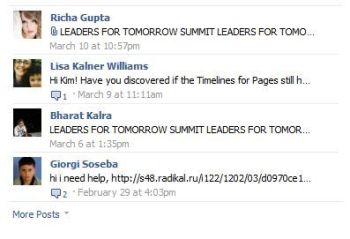
Posts by Other Users
Posts
by visitors no longer intermingle with your Wall posts; now, a block to
the right contains all of the recent posts from other users. Since the
posts are less prominent in this location, it's important to remember
to check them so that you don't miss any important messages or feedback
from potential customers.
Activity Log
 Check the Activity Log for what's posted on your page.
In
the Activity Log, you can see everything that is being posted on your
page, as well as moderate, edit, highlight, and delete content. It is
available under
Manage, Use Activity Log. Select the circle icon to the right of any post to edit it.
Milestones
Milestones,
another new Timeline feature, let you add past events related to the
history of your organization. To start using it, select
Milestones
where you enter a new Wall post, and add the date your business was
founded. Next, you can include important past events that deserve a
place on the Timeline.
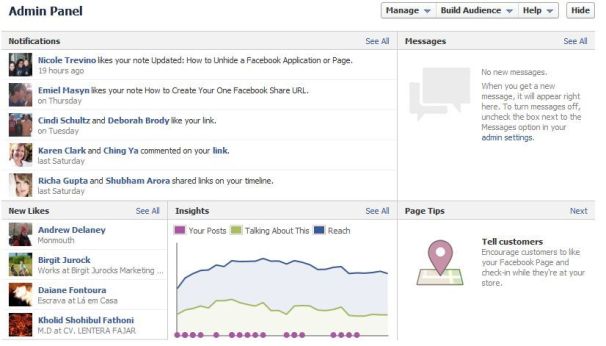
Manage Your Page
Admin Panel
Timeline's new Admin
Panel facilitates page management and includes five sections:
Notifications, Messages, New Likes, Insights, and Page Tips. Some of
these sections are familiar from earlier Facebook layouts, and are
merely now available in one location. Messages, as described earlier,
is the new area in which any private messages from visitors appear, and
it will be available only if you've activated that feature. Page Tips
is also new, but it's less useful, as it rotates through a variety of
topics rather than offering a method of answering a specific question.
 Options for page admins have changed.
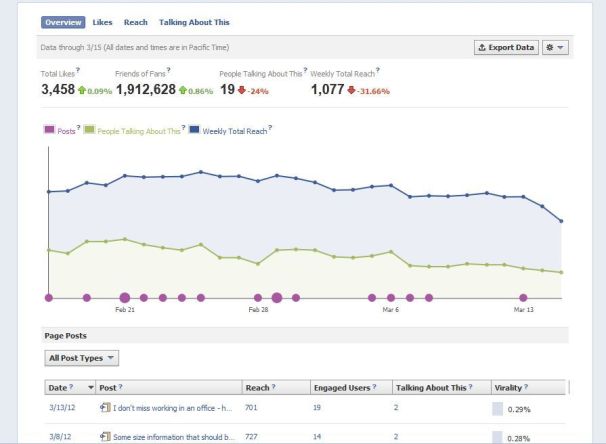
Insights and Statistics
Options for page admins have changed.
Insights and Statistics
You can access Insights via the
See All
link next to the Insights block in the Admin Panel. It remains the
same, with four content areas: Overview, Likes, Reach, and Talking
About This.
The Overview page shows the total number
of "Likes" for the page, the number of friends your fans have, the
number of people talking about the page, and the weekly total reach.
The bottom part of Overview is the Page Posts section, which shows the
reach, the number of engaged users, the number of people talking about
your page, and the "virality" of your page posts. Clicking any of the
data items in the Page Posts section brings up a pop-up chart with more
data about that post.
In all sections of Insights, you
can select a date range to obtain data for a specific time period. The
Insights Likes tab shows the demographics and location of people who
have liked your page, as well as where the Likes originated--such as
the from the actual page, a Like box, or a mobile device.
The
Reach tab includes data about everyone who saw your content, even
nonfans. It contains demographics, how they reached your page, page
views, unique visitors, total tab views, and external sites that
referred visitors to your page.
The Talking About This
tab provides more details about who created a "story" about your page.
This information includes the demographics as well as the viral reach
of your content that was shared. Demographic data for this tab is
available only when more than 30 people were talking about the page in
the seven days preceding the last day of the selected date range.
 You'll still see trends in activity on your page within Insights.
Manage
You'll still see trends in activity on your page within Insights.
Manage
From
the Manage menu at the top of the Admin Panel, you can access several
options: Edit Page, Use Activity Log, and See Banned Users. This same
menu also allows you to toggle between using Facebook under your
company/brand name (posting as the page admin) and using it under your
personal name (posting as yourself).
Edit Page
contains all of the settings that were previously available via the
Edit Page button on the old profile, such as Manage Permissions, Manage
Admins, and Apps. As mentioned earlier, you can no longer set a default
landing tab for new visitors to the page. When working with your page,
Manage will be the area you use most, so it is important to become
familiar with it.
Build Audience
Build
Audience, also at the top of the Admin Panel, is the section that will
assist in growing your Facebook page's audience. Here you have several
options: Invite Email Contacts, Invite Friends, Share the Page, and
Create a Facebook Ad.
The Help and Learning Video section is useful if you have specific Timeline questions or would like to take a tutorial.
Advertise
With
the arrival of Timeline, Facebook Ads become more important for
building an audience since you can no longer set a default landing tab
to gain new fans.
 Once you get started, you can try Facebook's tutorial for more assistance.Advertising on Facebook
 can be an affordable way to increase the visibility of your business to other Facebook users.
You
can target the ad based on location, demographics, and interests. You
can also set a budget to test the performance of your ad without
creating a hefty expense. Once that budget is used up, your ad will no
longer appear; if you wish, at that point you can add funds or decide
not to use the ad anymore. You can set up ads in the Admin Panel via
the Build Audience menu.